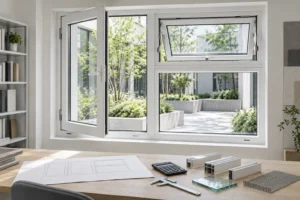
RGNL-100P Casement Window China Manufacturer Installation
A reliable RGNL-100P installation package connects the approved window schedule to the measured opening, frame position, sill support, perimeter joint and interior/exterior finishes. These interfaces should be resolved before production and checked again before the opening is closed.

Connect the Product Schedule to the Wall Opening
The official RGNL-100P Thermal-Break Energy-Saving Window page provides the product basis: a 100 mm aluminum system with several glass, finish and opening options. The window is publicly assigned to the Casement Windows product category.
The product table does not publish project fixing spacing, perimeter gaps, sill geometry, sealant type or drainage details. Those items must come from approved project drawings, substrate conditions, local requirements and a returned installation detail for each wall type.
RGNL-100P Quick Specs and Installation Controls
| Item | Published RGNL-100P data | Installation control |
|---|---|---|
| Series | RGNL-100P thermal-break energy-saving window | Repeat the exact series on schedules and shop drawings |
| Frame basis | 100 mm system; 6063-T5 aluminum; 1.6 mm thickness | Coordinate the returned section with the wall and sill detail |
| Glass families | Tempered; double or triple tempered; laminated, Low-E, reflective or tinted | Freeze one complete build-up for each window mark |
| Published glazing notation | 5 mm + 15Ar + 5 mm | Confirm the notation and ordered assembly in writing |
| Surface treatments | Powder coating, anodized, wood grain or PVDF coating | Protect the approved finish during handling and close-out |
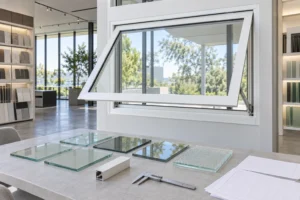
| Opening modes | Inward, tilt-and-turn, outward or awning | Verify handing, opening arc and adjacent clearance |
The table identifies the product, not a universal installation method. Final fixings, joints, membranes, sill support and drainage require project-specific approval.
Compare the Main Installation Interfaces
Rough Opening
Survey width, height, diagonals, substrate condition and finished levels by window mark. Record discrepancies before the factory release instead of forcing a finished frame into an unverified opening.
Frame Position
Show where the 100 mm system sits within each wall build-up. Coordinate interior reveal, exterior cladding, insulation line and usable handle or sash clearance.
Sill and Water Path
Define continuous support, finished sill level, exterior fall, waterproofing transition and drainage route. The public product table does not prescribe these details.
Perimeter Joint
Specify joint width, backing, air and water layers, movement allowance and finish interface in the project detail. Confirm compatibility against the actual substrates and approved materials.
Approval Hold Points Before Close-Out
- Match delivered labels, frame sections, opening modes, glass and finish to the approved schedule.
- Confirm the surveyed opening and the agreed frame location before fixing.
- Check frame level, plumb, square and distortion using the project acceptance criteria.
- Verify sill support, perimeter layers and water-management transitions before concealment.
- Operate each sash and inspect clearances, locking and contact points before finishes are completed.
- Record photographs, unresolved items and approved corrective work by window mark.
No numeric installation tolerances are claimed here because the official product table does not publish them. Put the applicable project values and inspection method in the approved installation package.
Coordinate Opening Mode with Installation Access
Inward, tilt-and-turn, outward and awning modes create different sash paths and access conditions. The window schedule should show the viewing side, hinge side, handle side and opening arc. Check nearby walls, furniture, screens, façade access and maintenance approach before approval.
For any fixed and operable combination, number the lites and identify which parts move. This keeps the installation drawing aligned with the factory elevation and prevents a mirrored or inaccessible sash from reaching site.
What Changes the Installation Quote?
Cost can change with opening quantity and condition, access, lifting, frame position, substrate type, sill support, perimeter-joint scope, interior and exterior finishes, protection, testing, remedial work and responsibility for waste or making good.
Separate window supply, freight, unloading, storage, installation, access equipment, sealants, membranes, trim and testing in the comparison sheet. A low installation figure is not comparable when key interfaces are excluded.
Installation RFQ Inputs
- Window schedule, elevations and quantities
- Opening survey by unique window mark
- Wall sections and frame position
- Finished floor, sill and reveal levels
- Opening mode, handing and sash clearance
- Approved glass and finish schedules
- Substrate and fixing-zone information
- Perimeter air and water continuity details
- Access, lifting and storage constraints
- Inspection and close-out records
- Supply and installation responsibility matrix
- Destination and delivery program
Send the window schedule and wall details to Rogenilan for a product-specific interface review.
RGNL-100P Installation FAQ
Does the product page provide fixing spacing?
No. The verified table does not publish fixing spacing. The project detail should define fixings from the proposed frame section, substrate, opening size and applicable requirements.
What opening information should be surveyed?
Record width, height, diagonals, finished levels, substrate condition and wall build-up for each unique window mark, then compare the survey with the approved schedule.
Can one sill detail be used for every wall?
Only after checking the frame position, support, exterior finish, waterproofing transition and drainage route for each wall type. The product table does not establish a universal sill detail.
Which opening modes are published?
The official RGNL-100P table lists inward, tilt-and-turn, outward and awning opening. Mark the selected mode and handing on every operable window.
What should be checked before the perimeter is concealed?
Confirm the frame position, project acceptance checks, sill support, perimeter layers, water-management transitions and any required inspection record before close-out.
Request an RGNL-100P Installation Review
Share the schedule, opening survey, wall sections, sash modes, glass, finish, access constraints and responsibility matrix. Rogenilan can review the window interface against one controlled project package.